W1209 Temperature Controller Thermostat
DC 12V heat cool temp thermostat temperature control switch
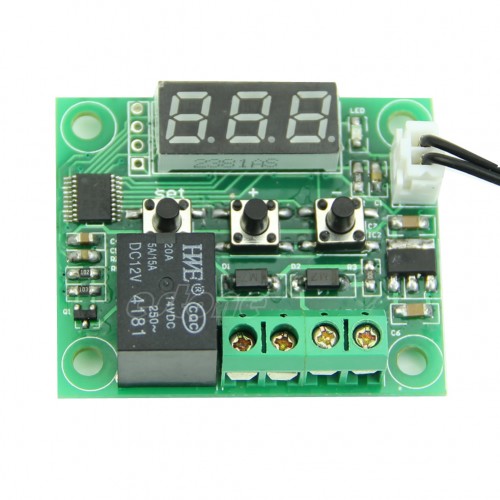
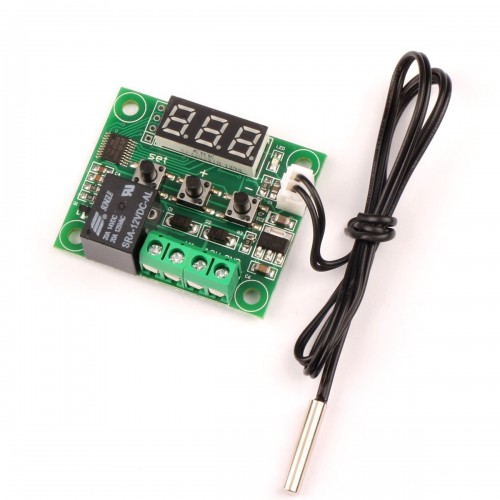
The W1209 Temperature Controller Thermostat Module is an incredibly low cost yet highly functional thermostat controller. With this module, you can intelligently control power to most types of electrical device based on the temperature sensed by the included high accuracy NTC temperature sensor.
How do you use a w1209 thermostat?
Instructions for use W1209 Temperature Controller Thermostat Module: Connect the power supply and equipment, the measuring temperature is displayed, press the “SET” button, press ” + or – ” to set the desired temperature (long press ” + or – ” to quickly increase or decrease), press “SET” to confirm the setting and return, controller.
More Products

Description of W1209 Temperature Controller Thermostat Module:
Temperature control range: -50 ~ 110 ° C
Resolution: -9.9 to 99.9 is 0.1° C, 1 ° C temperature ranges other
Measurement Accuracy: 0.1 ° C
Control accuracy: 0.1 ° C
Hysteresis accuracy: 0.1 ° C
Refresh rate: 0.5 S
Input Power: DC12V
Measuring inputs: NTC (10K 0.5%) Waterproof sensor 0.5M
Output: 1 Channel relay output, capacity = 10A
Environmental requirements: -10 ~ 60 degree Humidity 20% -85%
Size: 48 (L) * 40 (W) * 14 (D) mm
Power consumption: Static current:<=35MA, Attract current:<=65MA
PACKAGE INCLUDES:
- W1209 Temperature Controller Module
- 45cm (18″) long temperature sensor probe
KEY FEATURES OF W1209 TEMPERATURE CONTROLLER MODULE:
- 3-digit display of temperature
- The module can operate in a heating or cooling mode of operation
- Multiple parameters can be set such as temp trip point, hysteresis and delay.
- Waterproof NTC temperature sensor has -30 to +110°C measurement range with 0.1°C accuracy
- Relay switches up to 120VAC @ 10A or 14VDC @ 10A
- 12V module operation
This module measures and displays the temperature and allows you to control power to most types of electrical equipment based on that temperature. A single output relay can be turned ON or turned OFF as temperature rises or lowers past a thermal threshold that you set. You can also set a temperature hysteresis, relay activation delay and thermal limits for the operation of the module.
A built-in STM8S uC allows you to configure the module using the display and 3 pushbuttons. All settings are saved into non-volatile memory and are preserved during a power cycle.
The temperature is sensed by a high accuracy waterproof NTC 10K Thermistor that has a range of -30°C to 110°C (-22°F to 230°F). The sensor cable is about 18″ long, but it is possible to splice wire to lengthen the cable if needed.
The relay is rated for up to 120VAC @ 10A and 14VDC @ 10A. When the relay is energized a red LED is lit. It is also possible to use the relay on this module to switch higher power relays if you want to control a lot of power.
Displaying the current temperature:
The W1209 Temperature Controller Thermostat Module will display the current temperature in oC by default. When in any other mode
making no input for approximately 5 seconds will cause the thermostat to return to this default
display.
Setting the W1209 Temperature Controller Thermostat Module trigger temperature:
To set the trigger temperature press the button marked ‘SET’. The seven-segment display will flash.
You can now set a trigger temperature (in oC) using the ‘+’ and ‘-‘ buttons in 0.1-degree increments. If
no buttons are pressed for approximately 2 seconds the trigger temperature will be stored and the
the display will return back to the current temperature.
Setting the w1209 parameters:
To set any parameter first long press the ‘SET’ button for at least 5 seconds. The seven-segment
the display should now display ‘P0’. This represents parameter P0. Pressing the ‘+’ or ‘-‘ buttons will cycle
through the various parameters (P0 to P6). Pressing the ‘SET’ button whilst any of there parameters
are displayed will allow you to change the value for that parameter using the ‘+’ and ‘-‘ buttons (see
below). When finished setting a parameter press the set button to exit that option. If no buttons are
pressed for approximately 5 seconds the thermostat will exit the parameter options and will return
back to the default temperature display.
Setting the cooling or heating parameter P0:
The parameter P0 has two settings, C and H. When set to C (default) the relay will energise when the
temperature is reached. Use this setting if connecting to an air-conditioning system. When set to H
the relay will de-energise when the temperature is reached. Use this setting if controlling a heating
device.
Setting the hysteresis parameter P1:
This sets how much change in temperature must occur before the relay will change state. For
example, if set to the default 2oC and the trigger temperature has been set to 25oC, it will not de-energise until the temperature falls back below 23oC. Setting this hysteresis helps stop the
thermostat from continually triggering when the temperature drifts around the trip temperature.
Setting the upper limit of the thermostat parameter P2:
This parameter limits the maximum trigger temperature that can be set. It can be used as a safety to
stop an excessively high trigger temperature from accidentally being set by the user.
Setting the lower limit of the thermostat parameter P3:
This parameter limits the minimum trigger temperature that can be set. It can be used as a safety to
stop an excessively low trigger temperature from accidentally being set by the user.
Setting temperature offset correction parameter P4:
Should you find there is a difference between the displayed temperature and the actual temperature
(for instance, if the temperature probe is on a long run of cable) you can make minor corrections to
the temperature reading with this parameter.
Setting the trigger delay parameter P5:
This parameter allows for delaying switching of the relay when the trigger temperature has been
reached. The parameter can be set in one-minute increments up to a maximum of 10 minutes.
Setting the high-temperature alarm parameter P6:
Setting a value for this parameter will cause the relay to switch off when the temperature
reaches this setting. The seven-segment display will also show ‘—‘ to indicate an alarm condition. The
relay will not re-energise until the temperature falls below this value. The default setting is OFF.



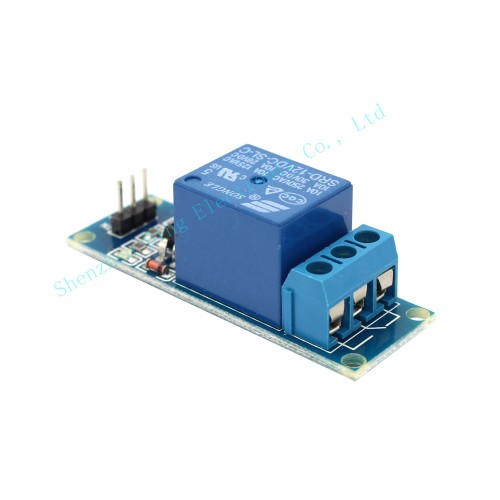 1 Channel 5V Relay Module